i love teaching this class. we always are trying new things and this year was no exception. in class i loved seeing that there were quite few new faces and i had said i would post instructions for them so i thought i would just post here. do keep in mind that the instructions were created for me to remember sort of what i did !! i hope it gives everyone inspiration to make their own tags.
 Tag 1
Tag 1
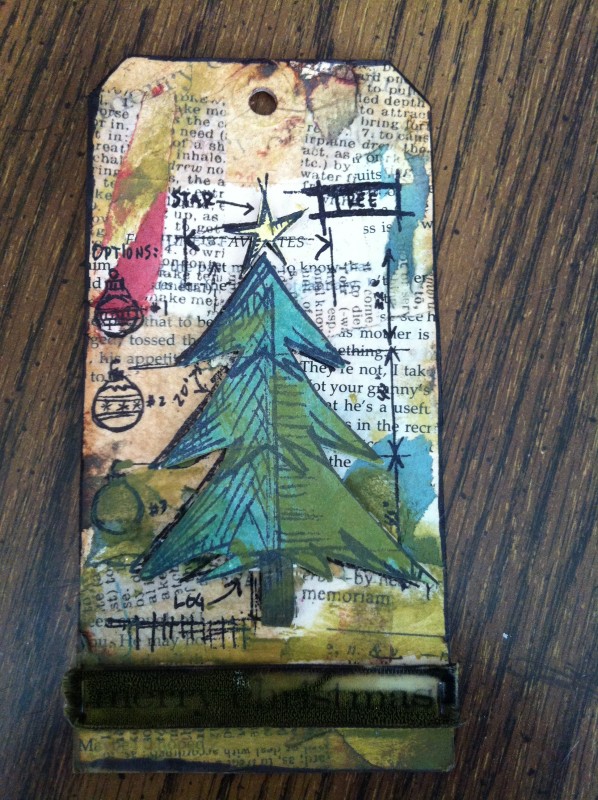
Layer strips of tissue paper, book paper, & tim dictionary/music note tissue paper on to tag using matte medium. Once dry tear off pieces to expose background. Use distress inks/blending tool apply. Stamp ‘tree’ onto tag and on the square manila piece of paper. Colour manila tree with distress inks. Add spritz of glimmer. When dry cut out and pop dot onto tag. Stamp ‘Merry Christmas’ onto prima ribbon. Attach with tiny attacher.

Tag 2
Leaving wreath in the form apply two distress paints and spray with water to blend. Dry. Colour ‘ribbon’ with distress ink. Place ornamental die in embossing folder.. emboss and ink brown. Stamp ‘saying’ onto manila with red archival ink. Outline in black archival ink. Spray ribbon in frost glimmermist. Use distress tool on blank tag. Stamp pine branch on edges. Layer all together. Add 3 dots of liquid pearls.
 Tag 3
Tag 3
Ink stamp in distress ink. Attach piece of music note across the centre. Stamp onto watercolour paper the three images.and cut out using framlits. Colour in using distress markers. Pop dot ‘Merry Christmas”
 Tag 4
Tag 4
Leaving in tack in the grungeboard/grungepaper colour soldier:
red – hat, chest cover, arms. white X tip sleeves/hands. black boots.
Once completely dry sand. Remove and ink, dry, assemble. For the tag ink using browns. Stamp holly in vintage photo. Stamp toy solder in black archival ink. Flick with water and once dried attach your soldier.
 Tag 5
Tag 5
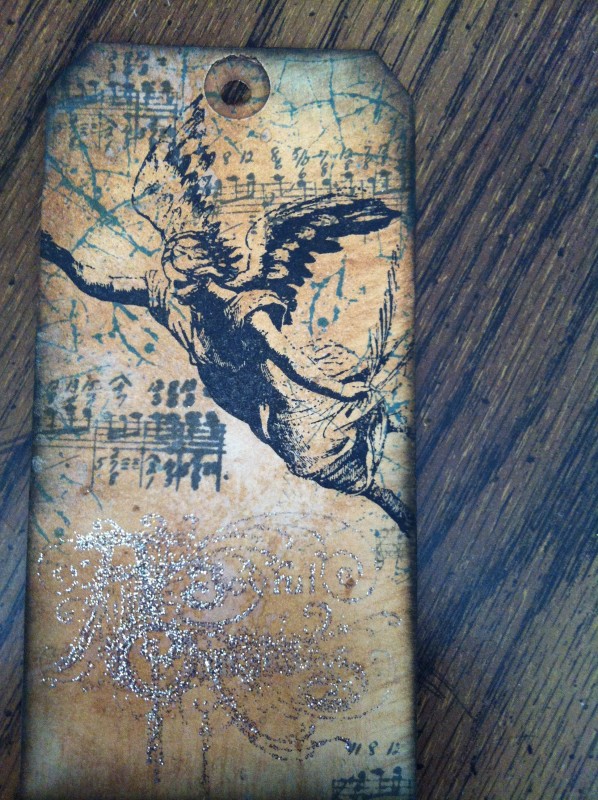
Ink background with blending tool and distress inks. Stamp ‘glass’ in blue archival. Stamp music note with brown archival. Stamp angel in black archival.
Stamp ‘Joyous” with embossing ink. Sprinking embossing sticky powder heat and then apply glitter.
 Tag 6
Tag 6
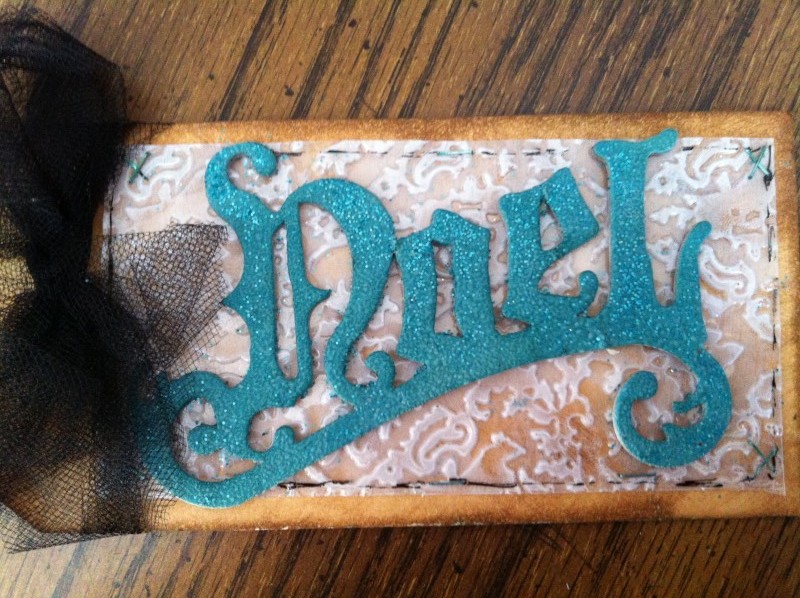
Ink tag with distress ink. Using embossing folder of choice emboss the acetate. Add white paint to back of acetate. Let almost completely dry and then remove top layer of paint with paper towel. Attach to tag with mini attacher. Ink ‘Noel” and or “25” with either a blue or pink ink. Sprinkle and set using sticky embossing powder. Add matching glitter. Attach to Noel with glossy accents. Tie tulle around top of tag
 Tag 7
Tag 7
Apply foil to tag. Smooth out. Place in folder of choice and emboss.
Cover in black paint..wait a minute and wipe gently. Dry. Repeat with blue. Dry and buff. Continue adding colour until you are satisfied. I ended with black
 Tag 8
Tag 8
Stamp Santa onto tag with grey archival ink. Cover whole tag with distress inks using blending tool. Spray beard with white dylusions..blot off excess. Colour half ornamental frame with silver paint. Layer the small black piece and frame to side of tag. Spray entire tag with frost glimmermist. Attach tinsel
 Tag 9
Tag 9
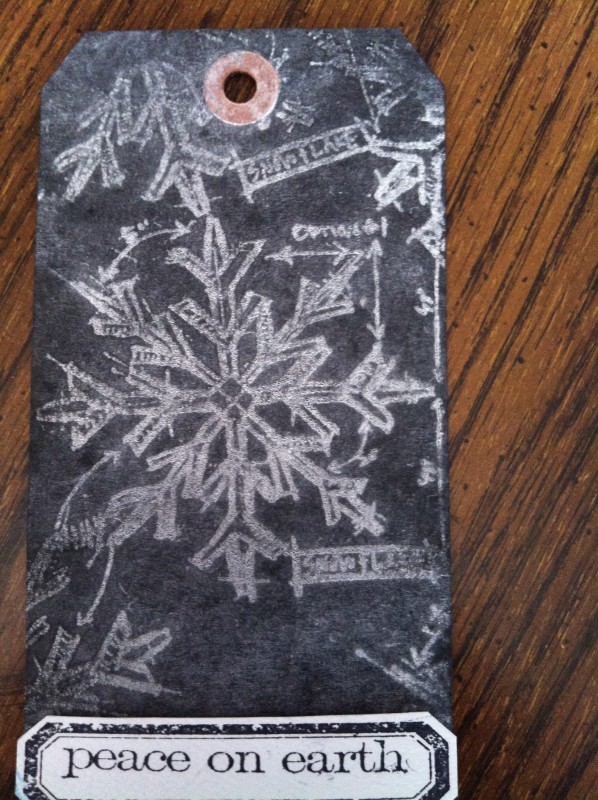
Stamp image on black tag with embossing ink. Using antiquities embossing powder heat but stop before it turns to gloss. Rub chalk over entire tag. Using finger blend. Onto water colour strip stamp frame and then saying using archival ink. Staple to tag
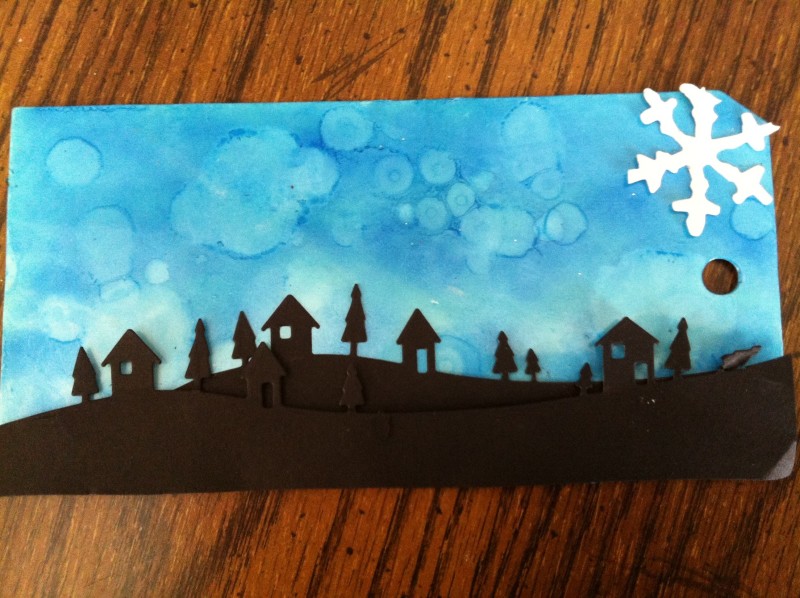 Tag 10
Using alcohol ink from lightest to darkest and felt and blending tool ink tag.
Using both the strips of black (one shorter than the other) die cut the house scene. Please note when you are going to do this that you want to do one at the top of the long strip of black and the middle of the short…. Pop dot the front strip
 Tag 11
Using stencil and embossing paste emboss bits onto manila tag. Once dry using distress ink & water, blend / dry. Distress ink and dry. Stamp in archival ink. Attach reindeer and title
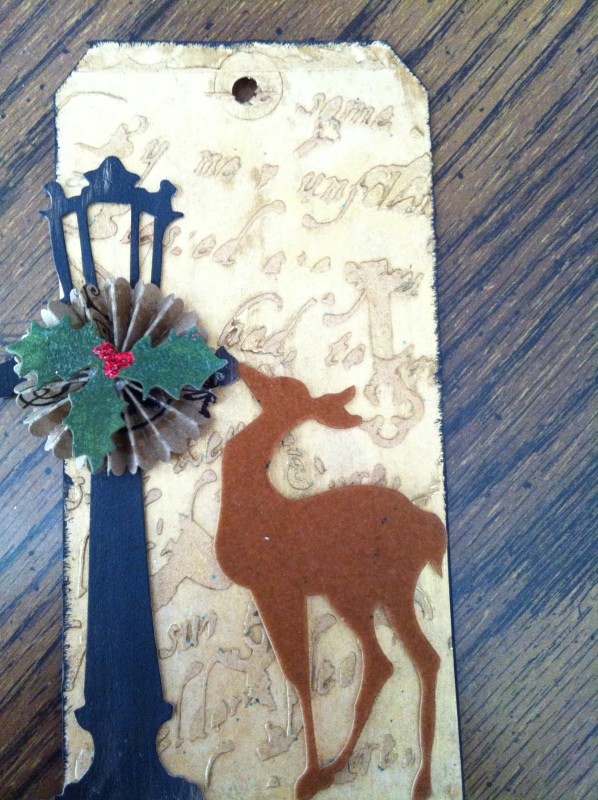 Tag 12
Using stencil and embossing paste emboss bits onto manila tag. Once tag is dry you are going to mix a bit of raw umber and matte medium onto craft mat and wipe over entire tag. Wait about 90 seconds (or when you can see it is starting to dry) and wipe away using a baby wipe (one baby wipe and keep switching it around. You do not want to remove all the umber) repeat using a dab of gold and medium.
Using black and or brown paints paint your lantern. using green your leaves and red berries.. I used stickles note long drying time. Assemble your star using hot glue gun. Layer all onto your tag. Pop dot standing deer.
and there you have it. i hope you all take time to share what you think and how you made out creating your own tags.
diana